


We are moving part 2 | Forest, water & meadow
- Dec 10, 2023
- 6 min read
We didn't just sit back and relax. After we got the keys, we started working hard on our very first project: the forest, the water and the meadow. And I get a lot of responses to the first one in particular: what I'm going to plant, how I'm going to approach it, etc. etc. To answer all questions at the same time, I will write down my plans and my vision here. Some of you will agree with my approach and some of you won't, but no matter what I do this'll always be the case; I just hope that I can inspire you with my ideas. In this blog you can follow the process from idea to implementation.

STEP 1 - What do I want?
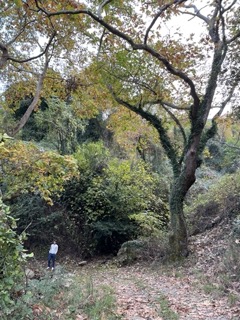
I've never designed a forest in my life. In addition, I am not a full-fledged tree expert and I only know the trees that I use in my designs, which are often exotic. You've probably already seen my favorite selection in my book. Where do you start with a design that will cover the majority of your plot? The first step is to consider what kind of forest I want (and don't want). With the many trips I have made with Bas in recent years, I have a lot of reference material and I have quickly come to the conclusion what I absolutely do not want; a forest with only a few types of trees or a forest where you can still clearly see the trunks as in the pictures below. I don't want a pine or spruce forest like in Germany (photo 1), I don't want a monotonous forest with only beech trees like in the second picture in Rotterdam or a forest where you only see the trunks with low vegetation underneath like in the third picture in Japan.


What I do want is a varied forest where it is actually a big mess. Tall trees with beautiful crowns, full low shrubs, climbing plants and ferns. Everything grows together and the only thing you see is a path. It can grow completely closed and apart from sporadically taking a walk around, it doesn't need to be fully accessible for us. The intention is to completely return the 7,000 m² that we are going to plant to nature and, apart from our occasional walk, we have nothing else to do there. So I am looking for the layering of greenery as in the first picture below in Greece, the variety in vegetation as in the second picture in Italy and the combination between water and forest as in the last picture in Rotterdam (this is the same forest as the second photo above, but a different part). So now that I know what we want, it's important to think about how we can imitate this. Time for step 2!


STEP 2 - The construction
Now that I know what kind of forest I want, I started thinking about the structure of the forest to create the layering that I would like to imitate. At first, I just wanted to plant those blades, but I don't think you will get a beautiful forest, but a... blade forest. The first layer that we will therefore plant consists of 36 large trees with a height of 300/350 cm, which we'll plant approximately 15 meters apart. This gives them space to develop a beautiful full crown, and these trees can eventually reach a height of 30 meters. These are the large, black circles on the drawing (just scroll up to see them in the drawing).
The second layer is a type of tree which grows more vertically. I want to plant these in the middle of the large trees with the wide crown. There will be about 100 in total; they are indicated in the drawing with a green cross. In between those are trees that grow less high, about 15 meters. They are also nicely distributed between the large trees, but still remain a good distance from the large trees. These are the smaller circles with a color. Finally, we will fill everything with low vegetation up to 8 meters. We will plant this as small blades, also called forest plantings. These are the dots on the drawing. You will occasionally see green areas along the forest path, which I actually want to keep as more open spaces where more ferns etc. can grow in the future. Like any walk, this one should also be an experience. When you walk through the future dense forest, you will pass some open spaces during your walk, or you will have to walk over some kind of bridge over the water. I can see myself taking that walk every day before I go to work.
STEP 3 - Choose species
Now the most difficult part: choosing the tree species. I did some research for this, and I spoke to someone from Landschapsbeheer Zeeland for whom it is a daily routine to plant forests. They have informed me well about the species that do well here in the Zeeland clay and that are also native and therefore good for the fauna in this area. The choice of tree species is a mix of the advice I have received, what I like and tree species that may be future-proof. So there will be willows, nut trees, alders, privet, lime trees, currant trees and Euonymus. But also Prunussen and even (I almost dare not say it) Anna Paulownia. According to the ANWB forest guide, this is the tree that is extremely suitable here and will do well with the current climate change... I'm curious. What I am not going to plant are poplars, ash trees or elder trees. These will come naturally, or so I've heard. The most important thing is that with the forest we can contribute to a better living environment for so many animals, which together ensure that our living environment becomes better and healthier. I can't wait until their new home is ready, and we can enjoy it immensely. I am also very curious how quickly such a forest develops and how quickly animals can find their place, how long it takes before the soil is healthy and how quickly the insect population will increase. We're going to discover it all!
STEP 4 - The water
The plots of water you see in the drawing are not fancy ponds with a cover that ensures that there is always water in them. We're not going to plant anything here or do any other tricks to make it look good. These will actually be mega wadi's which will mainly fill up when it has rained a lot and will probably also be dry when it has not rained for a long time. We'll also apply the principle of letting nature do its thing and I have no idea how this will turn out, but I am sure it will be beautiful and I especially hope that we can make a new home for animal life. The water will be dug next Monday (it is now November 25th) and I am really looking forward to this. I am a huge fan of water in the garden, just the small ponds we have in Rotterdam make such a difference in the diversity of insects and amphibians you get in the garden. I really enjoy this intensely and get particularly excited when I see a dragonfly flying or a frog splashing in the water; wealth can be that simple in life. In addition, the view of the water is also just fantastic. Just look at the example picture of Rotterdam; that makes you instantly happy.
STEP 5 - The meadow
There will be a meadow between the two forests and the water. Grass is already growing here, and we'll just leave it that way. I can sow all kinds of things, but I haven't exactly had good experiences with this. I believe that to create a successful and varied meadow field you have to do a lot and I don't have the time for that, so I just want to let it grow and then let sheep graze there. Not only that, but I recently received a very sweet message from a lady whose daughter is a sheep shepherd near Veere. If you're reading this, I'll message you soon. Grazing grass is the most natural and best way to create a varied landscape. So much for the plans. I can hardly imagine what all this will look like in a few years, especially when I look at the blubbery mess that the land has now become, but I have full confidence that everything will turn out well. Especially with the good help we receive from our gardening neighbours, who think and work so well with us. In any case, the water is already being created, in a few weeks the trees will be added and the meadow will emerge automatically. When I sit at my computer around this time next year, I can look back on a year in which a lot has happened and where I can look back on the special process of this major project. I'm very curious how I'll look back on this period and this approach in a few years... And I only learn from the things I did wrong. Next time, part 3: the move of the test garden and the new garden + the nursery.
Toedels!


